A
 |
| From the Art LeBrun collection |
Author's note: Many of the cool photos seen in this piece are from the courtesy of the late, great Art LeBrun's collection. About nine years ago we connected when I posted some photos on NASAspaceflight.com's "L2" area in a thread about historic rockets. He chided me for "finally" joining the discussion and we later began swapping e-mails. I ended up sending him my full high resolution images of the LC3/4 blockhouse and mentioned that I was doing research for the Juno II flying model rocket for my Dr. Zooch Rockets kit. Art said he had some pictures that may help and he sent me a cash of Juno II images in return for my blockhouse images. Art was an amazing collector, but unlike others he very freely shared photos from his collection. Art passed away in 2013 and to his memory and friendship and skills in rocket history this blog post is dedicated.
Art- we miss you.
Perhaps the most un-glamorized booster ever produced by von Braun’s team at ABMA (Army Ballistic Missile Agency in Huntsville) was the Juno II. Only ten of these vehicles were launched in a two and one half year period, and only four of those were able to be called successful, yet today nearly every “rocket garden” seems to have one on display!
 |
Juno II
cutaway.
author's |
The Juno II was derived by taking a Jupiter IRBM, lengthening its tank section by 36 inches and then adding the same upper stage configuration as had been used on the Jupiter C to place Explorer I into orbit. This configuration could place a 100 pound payload into earth orbit or send a 15 pound payload toward the moon. The latter of those two options being very tasty in 1958, following the success of Explorer I, when the concept of the Juno II was first proposed. Although the Air Force was snapping up every Jupiter missile that came off the production line as part of a crash program to deploy them in Europe, ABMA had already sealed a bid for five of the missiles for their own use. In February 1958, von Braun had flown out to JPL ( the Cal Tech Jet Propulsion Laboratory) right after the success of Explorer I and sat down with William Pickering for what was called a “Juno Meeting.” There they planned to fly the Juno II and to shoot for the Moon before the end of 1958.
 |
The high speed section
minus the barrel. ABMA |
Keep in mind here that the concept of staging as it would become known in the later Titan boosters, had yet to be perfected. Likewise complex electronic commanded stabilization of space vehicles was also still on the drawing boards. Nearly every space vehicle launched by the United States was spun in order to provide initial stability after booster separation. At ABMA their partnership with JPL came up with a spinning drum and clustered solid fuel upper stage concept.
 |
High speed section showing its spin barrel being hoisted
from a truck and placed aboard vehicle AM-19G.
Art LeBrun collection |
It used “Baby Sergeant” rocket motors. Each Baby Sergeant solid-fueled motor produced 1,573.66 pounds of thrust to a maximum 6 second burn, that normally lasted about 5.5 seconds. Each measured 46 inches long by 6 inches in diameter. The second and third stage Baby Sergeant motors also burned 50 pounds of T17-E2 solid fuel. The fourth stage Baby Sergeant motor burned 50 pounds of JPL-532A solid fuel, a slightly more efficient fuel than that burned in the second and third stages. Oddly the Baby Sergeant were nothing like their namesake Sergeant which had a takeoff thrust of 45,000 lb, burned for 34 seconds and measured 31 inches in diameter and a length of 34.5 ft. The link below will take you to some animation showing this process for a Juno II.
 |
Unpainted high speed
section shroud. ABMA |
That three stage assembly was dubbed “the High Speed Section” or the “velocity package.” The boost process of the Juno II itself is fairly interesting with the first stage firing for a total of 180 seconds burning RP-1 (refined kerosene) and LOX (liquid oxygen) as the upper stages spun up to just under 450 RPM. Then high-speed section containing the upper three stages would separate and ignite. The second stage contained a cluster of 11 baby sergeant solid propellant rockets. Following that the third stage made up of 3 baby sergeant motors while the fourth stage consisted of a single baby sergeant motor. The high speed section also was equipped with 12 square fiberglass “windows” that allowed payload antennas better reception of radio signals.
Spin testing was critical with the High Speed Section because the Juno II had no hold-downs and was secured to the launch stand by nothing more than its own weight, an unbalanced, high RPM spinning of that section could actually cause the whole stack to fall over before the engine ever ignited.
 |
| Jupiter/JunoII launch launch stand ABMA |
Additionally, during flight the high RPM, and fairly heavy high speed section, could vibrate its housing to pieces if it were unbalanced. Each section was unique and in spin testing it was balanced in a similar method to wheel balancing on a car as small pieces of metal on the rim were moved around to achieve perfection. One question that cropped up in the early planning stages of the High Speed Section on the Jupiter C was the thought that the centrifugal force of spinning may cause the solid propellant motors grain to bend out of shape and improperly burn. For that reason an early spin test took two of the baby sergeant rocket motors and spun them up to above 400 rpm where they were both fired. The motors burned correctly under those conditions.
 |
The first Juno II and her
pad rat crew. Art LeBrun collection |
On the first day of May, 1958 ARPA, (the Advanced Research Projects Agency) took over supervision of the Juno II from the Army and suddenly ABMA’s supply of Jupiter boosters doubled to 10. When NASA was formed in October of that same year, it elected to take up the Juno II program. Then on December 3, 1958 JPL became a part of NASA and everyone was looking toward the first launch of this “new” rocket. By the end of 1958 the von Braun team, on behalf of the newly created NASA, assembled and launched the first Juno II from Pad 5 at Cape Canaveral. NASA was itching to go from space planning to space flying and the Juno II, although developed by the ABMA, would give the public appearance of being a NASA vehicle and NASA project- so much so that the first two Juno II’s had the black letters “NASA” painted on their first stages.
 |
| Pioneer III probe. JPL |
 |
| AM-11. Art LeBrun collection |
On December 6, 1958 the first launch of a Juno II, vehicle AM-11, took place and lofted the Pioneer III probe- it’s target, the Moon and a lunar fly-by. The mission objectives were to measure the radiation intensity of the Van Allen radiation belt, test long range communication systems as well as the launch vehicle and other subsystems. Pioneer III and Pioneer IV were both tiny gold, cone-shaped probes that were packed with 1950s era electronics yet still light enough for the launch vehicle to shoot them past the Moon and into solar orbit.
Ignition of the booster’s single engine, which was the grandfather of the later Saturn I’s LOX/RP-1 powered H-1 engine, lit up the night at Cape Canaveral. All appeared normal as the rocket faded to little more than a fast moving star in the night’s sky. The Juno II’s first stage, however, was consuming its propellants at a slightly higher rate than planned and it shut down 3.7 seconds early. Although all of the high speed section’s rocket motors fired normally the payload failed to reach proper orbital escape velocity. It did, however, reach an altitude of 109,740 miles (measured from the center of the Earth) before it was recaptured by the home planet’s gravity and drawn back. The probe re-entered the Earth's atmosphere over Africa at 2:51 am Eastern Standard Time and burned up on December 7, ending its brief mission.
 |
AM-11 MSS rollback
Art LeBrun collection |
 |
| AM-14 Art LeBrun collection |
 |
AM-14 fueling.
Art LeBrun collection |
Undeterred by that first failure NASA gave it another try on March 3, 1959 as AM-14, the second Juno II, was launched with Pioneer IV aboard. After a successful launch Pioneer 4 achieved its primary objective (an Earth-Moon trajectory), returned radiation data and provided a valuable tracking exercise. The probe passed within 37,280 miles of the Moon's surface on March 4, at a speed of 4,492 mi/hr. The distance was not close enough, however, to trigger the probe’s photoelectric sensor so it did not detect any lunar radiation. After passing the moon it went into solar orbit along with its cylindrical fourth stage casing tumbling several miles behind.
 |
| AM-16 blowing up. Art LeBrun collection |
This video not only shows the production of AM-14, but it shows the abort and what happened inside the blockhouse when it happened! Although Periscope Video spoils it with their banner it's still cool to watch and listen to what it was like to be there.
The third launch of a Juno II, monikered AM-16, became one of the most re-run rocket blow-ups ever recorded on film in a flight that lasted just five seconds. A short in two diodes in inverter #1’s voltage regulator caused a power loss to the guidance control system which caused a loss of control. The Juno II was blown up by Range Safety near the ground on July 16, 1959.
 |
Remains of AM-16
Art LeBrun collection |
 |
AM-16 in a happier moment.
Art LeBrun collection |
 |
One of the few images of AM-19B
Art LeBrun collection |
Some confusion surrounds AM-19B, the fourth Juno II flight, but most records say it was launched on August 15, 1959 and failed to insert its payload into orbit because the first stage shut down early. There are other notations that add the fact that the “guidance compartment” depressurized early and caused the high speed section to become unstable. This is likely the fuel supply for the cold fire reaction control jets. The payload was the Navy’s 5 pound “Beacon 2” navigation satellite.
 |
AM-23 liftoff. Note that the ruptured
pressure sphere caused by a bad solder
connection can already be seen venting
to the left. Art LeBrun collection |
AM-19A, the fifth Juno II flight was actually a success on October 13, 1959 and placed Explorer VII into orbit. The launch was delayed for two weeks due to the pad explosion of a Jupiter IRBM, AM-23. On September 15 the Juno II was on LC-5 being prepared for a late September launch when pad activity was cleared so NASA could launch the Jupiter from LC-26B. The IRBM went out of control almost immediately after liftoff and before Range Safety could hit the command destruct button the Jupiter’s RP-1 tank collapsed and the vehicle exploded. Pieces of the exploding rocket peppered the area and some struck the Juno II. Casualties were 14 dead… mice. They’d been housed in the Jupiter’s nosecone as biological specimens for NASA.
 |
AM-19A ready for launch
Art LeBrun collection |
The slight damage to the Juno II and resulting inspection delayed the launch to October 13, however. Explorer VII is still in orbit today- in fact it just passed over my head as I was writing this (no foolin’). The satellite itself was designed at JPL to detect Layman-alpha flux, measure solar X-rays, heavy cosmic rays, micro meteorite penetration, trapped energetic particles and anything else that the folks at JPL could think of without exceeding the 100 pound payload limit. Although it was powered by solar cells and 50s era NiCad batteries the satellite only transmitted data until February of 1961 and went silent on August 24 of that same year. Today it still orbits as NORAD ID 22 and international ID of 1959-009A and you can track it live here: https://www.n2yo.com/satellite/?s=22
 |
High speed shroud for AM 19C
being hoisted into place.
Art LeBrun collection |
On March 23, 1960 another Juno II failed as the second stage of AM-19C failed to ignite. Some reports say that the first stage re-contacted the second stage after separation. Aboard as payload was the Explorer S-46 satellite that had been commissioned by the DOD and the Air Force. That satellite ended up splashing into the Atlantic.
 |
AM-19C liftoff.
Art LeBrun collection |
 |
Explorer VII cut-away study.
JPL drawing |
 |
AM-19D poised on the pad
is the 7th Juno II booster.
Art LeBrun collection |
AM-19D, the seventh Juno II, placed Explorer VIII into orbit on November 3, 1960. The satellite was designed to gather and transmit data in real time about distribution of micrometeorites, electron temperature and electron density, temporal and spatial energy as well as ion concentrations. The vehicle went silent on December 27, 1960- just 54 days after it was launched. Amazingly, it remained in orbit until March 28, 2012.
 |
Rare image of AM-19F
Art LeBrun collection |
Another failure took place on February 25, 1961 when the eighth Juno II’s third stage failed to ignite. Lifting off from LC-26B the booster monikered AM-19F lofted normally through its first stage burn and after separation enjoyed a normal coast period. All 7 of the second stage’s rocket motors ignited and burned properly, but no indication of second stage burn was received. Thus the S-45 satellite that was slated to study the ionosphere got a close up study of the eastern Atlantic ocean instead.
 |
There are very few images of the later
Juno IIs. In this image of a Jupiter in
pre-launch assembly the vehicle in
the right background is believed to
be AM-19E the next to last Juno II
Art LeBrun collection |
On April 27, 1961 Juno II number 9, AM-19E, placed Explorer XI into orbit. Also launched from LC-26B the booster successfully placed the astronomy satellite into a 290 mile by 905 mile elliptical orbit where it provided data on gamma-rays until November 17 of that same year. It remains in orbit as of this writing in 2019. You can track it at this link: https://www.n2yo.com/satellite/?s=107
 |
The only known image of the final Juno II on the pad is thing
one showing Freedom 7 in radio frequency testing with
AM-19G the last Juno II enclosed in its MSS in the background.
NASA image |
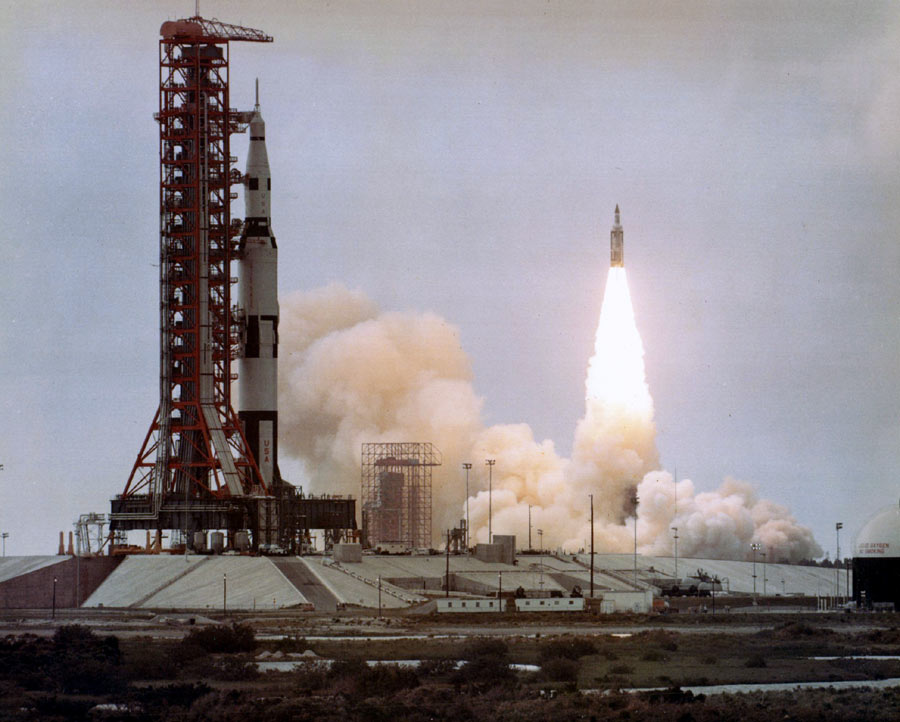
May 24, 1961 saw the final launch of a Juno II. The rocket was secured in its gantry as Alan Shepard’s Freedom 7 launched from nearby Pad 5 on May 5.
 |
This is the high speed section shroud
for AM-19G the 10th and last Juno II.
Art LeBrun collection |
AM-19G was slated to boost solar astronomy satellite S-45A which was a twin to the S-45 vehicle that had been aboard the eighth Juno II when it failed the previous February. The luck for S-45A was no better. The first stage burned as planned, but there was no indication of second stage ignition as the entire stack ended up in the Atlantic ocean.
By mid 1961 other space boosters- such as the Thor Able- were improving in reliability and the clustered spinning tub upper stages were considered highly outdated. NASA had burned through all of their inventory of Juno II boosters and thus no more Juno II flights were ever conducted. It’s important to keep in mind that the Juno II was never cancelled. Simply, all 10 of the modified Jupiter boosters that became the Juno II launch vehicles had been used and NASA had no active plan to further the project, so it ended. Oddly, by 1962 the Jupiter IRBM itself was actually outdated and the Air Force was left with a number of surplus missiles. Thus, some of those were dressed up to look like Juno IIs and set up as displays in rocket gardens around the planet. As of April 18, 2019 the Juno II display still stands and the Kennedy Space Center’s rocket garden. If you take a tape measure to it, however, you’ll find that it’s 36 inches too short, because it is actually a Jupiter dressed up like a Juno II… just like all the rest.
 |
| KSC Rocket Garden, April 18, 2019. Photo by Walt Evans |
In the end the Juno II was simply a vehicle that was quickly passed by as spaceflight technology experienced a swift growth. Although it was NASA’s second least successful US launch vehicle, it was also only NASA’s second space booster, the first being the Thor Able, two of which had failed previous to the first Juno II launch. However, the scorched crown for the absolute leas successful booster goes to the Atlas Able. Five boosters were built, two failed on the ground and three failed in flight. Yet, Juno II was the very first to have the name “NASA” painted upon it.
 |
| Photo by Walt Evans, KSC 4/18/2019 |
Ref:
King of the Gods: the Jupiter Missile Story, Ed Kyle, 2011
Astronautix.com
NASAspaceflight.com, Public and L2 areas
Et.Al.